Accessibility Checkpoint Live
Examples, Accessibility Checkpoint Properties,What is About
Accessibility Checkpoint in QTP
What is Accessibility Checkpoint?
World Wide Web Consortium (W3C) declared some guidelines
and instructions for Web based technology and information
system to make it easy for inactivated to access the web
space. For an example the standard have made it required to
have an 'alt text' for all type of image. So that any blind visitor
who is using, or visiting or accessing the website, can use text to
speech converter and at least can understand what is this image is
about if user can not see it. All these type of standards are
verified by Accessibility Checkpoints
Accessibility Checkpoints: can be supported only when the
add in's related to web is available and loaded. It verifies or
identifies if the scope on websites conforms to WWW consortium Web
accessibility instructions or guidelines.
It simple can be added while recording or updating through
activated screens.
Following are the properties which can be validate based on
accessibility checkpoints are -:
- Active X Check
- Check for Alt Check Property
- Applet Check
- Check for Frame Titles
- Check for Multimedia
- Check for Server Side Image
- Check for Tables
Tester can check one or more from above given options properties
as per project requirement:
From menu option settings can be changed easily:
Tools → Options → Advanced → Accessibility Options
We can unchecked or check the required options from here
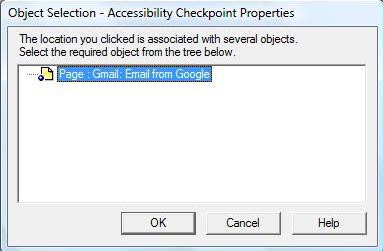
You will get the following screen there to select the options:
 |
| Accessibility Checkpoint Properties |
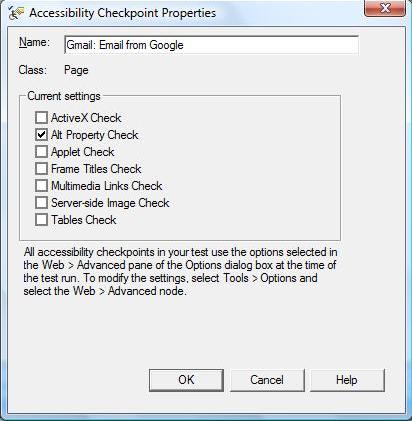
Now click on Ok and Check or unchecked the options from the
following screen and click on OK.
 |
| Accessibility Checkpoint Live Examples |
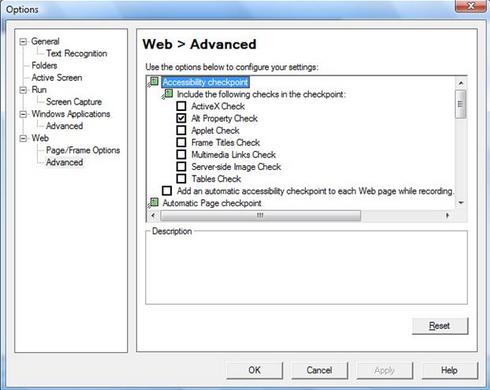
We can check it on what option are chosen at the following
location” Web → Advanced pane of the options dialog box:
 |
| Accessibility Checkpoint Options |
It simply explains why only the Alt Property check is by
default selected in the Accessibility Checkpoint Properties dialog
box. If you had a different-2 combinations of checks ON in the
Web → Advanced pane for Options dialog box, then same would
meditate for any of the resultant Accessibility checkpoints that we
might contains in our test.
Now need to Click OK on the Accessibility Checkpoint Properties
dialog box. Because with the case of the another checkpoints, Always
following statement will be added to our test.
We can edited it just the way we would do it with any other check
points from the OR and the testing result will display a pass if the
test has failed or passed if it did not resulted.
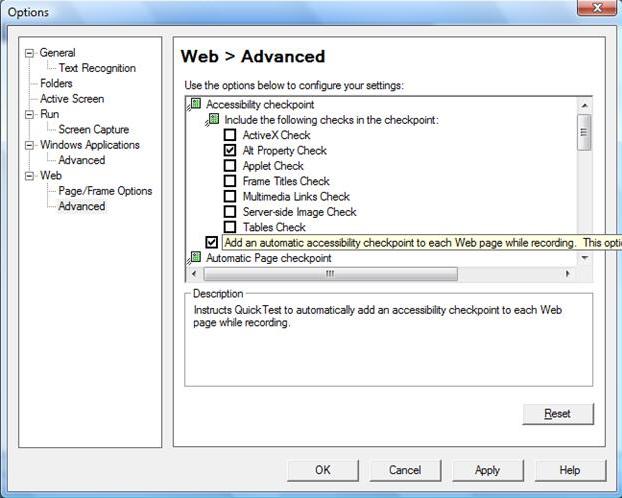
See We can select to submit a test by default for all the web
pages we access by setting the option ON as displayed in the screen
shot below:
 |
| Automatic Accessibility Checkpoints |


No comments:
Post a Comment